Replacing the PC2086 processor
As Cliff Lawson explains, a standard PC2086 cannot run Windows 3.0 in VGA mode (if you try, the screen goes black and it crashes). You either have to stick with the Windows 2.0 that came with the PC, or use the black-and-white CGA driver.
Update February 2013: An 8086-compatible VGA driver for Windows 3.0 has been created. If this works for you, it is almost certainly easier to use the new driver than replace the CPU — particularly if the CPU on your XT is soldered rather than socketed.
Assuming you don't want to install the new driver, then your only other option is to replace the 8086 processor with a NEC V30.
![[Screenshot]](Images/vga_vs_cga.png)
This screenshot shows the difference between Windows 3.0 in VGA mode (main picture) and CGA mode (inset).
Finding a V30
These days, it isn't easy to buy a V30 new. The best way to get one seems to be to cannibalise a PPC512 or PPC640; many of these had V30s.
In order not to have to go to the trouble of opening up a PPC to find out if it's got a V30 or not, you could run a program such as Snooper on it first, and check the processor type.
Fitting the V30
- Turn off and unplug the PC.
- Remove any expansion cards.
- Open up the case; there are two screws at the front, two at the back, and three where the expansion cards plug in. The top half of the case is connected to the bottom half by a blue and black wire which runs to the batteries. Halfway down this wire is a connector; unplug it to allow the halves to be separated completely.
- There is a large metal box running across the middle of the PC; this is the power supply. Looking at the PC from the front, the mains lead goes into it at the left-hand end and it is connected to the motherboard at the right-hand end. At each end are two little screws holding it down; unscrew all four. These screws have the annoying habit of getting lost inside the PC or even falling into the power supply itself, so take care when removing them.
- Turn the power switch on, so that it's pressed in.
- It should now be possible to lift the power supply out of the PC. You don't have to disconnect it from the motherboard unless one of the screws has got inside it; in which case, you may need the freedom of movement to shake it about until the screw falls out again.
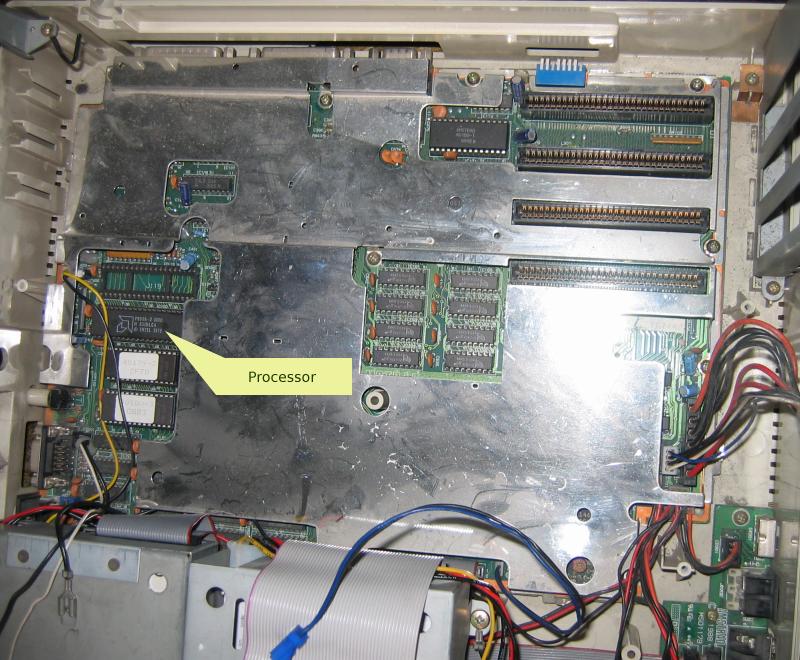
- Under where the power supply was, you'll see the motherboard, mostly
covered with a metal sheet. On the left, towards the back, there will be
either four chips, or (more likely) three chips and one empty socket. The
long chip second from the back is the processor.
- Get the processor out of its socket. If you stick a screwdriver under each end alternately, and lever it gently, then it ought to come out relatively painlessly. Do not force it or lift at one end only; that's a recipe for having bits snap off.
- Once the original processor is out, the V30 goes into the same socket. There will be a notch or circular depression at one end of the V30; this goes at the left-hand end (again, looking from the front). Make sure all the legs are engaged in their sockets and gently press the V30 down.
- Put the power supply back. If you did disconnect the motherboard power leads, remember to reconnect them. The plugs only fit one way round, so it shouldn't be possible to make a mistake here.
- Before putting the case back on, you may want to do a quick test. Connect a monitor and turn on the PC; if the "Please Wait" message appears, then the new processor is working.
- Reassemble the PC fully.
- Install Windows 3.0, choosing the VGA driver.
- With any luck, you should now get the Program Manager desktop.
John Elliott 23 February 2013